Back Exercises
Lat exercises are what give you that great “V” taper to your torso. Traps and upper back give your shirt something to hang on. There are two types of lat exercises, those where you pull perpendicular to your body (like in rows) and those where you pull in line with your body (like pullups). The king of the lat exercises is the pullup and it can give you that wide cobra-like flare faster than any other exercise. I divide this back exercises page into three parts, pullup bar lat exercises, rowing lat exercises and trap and upper back exercises. If you dont have a weight set, dont worry, the pullup bar exercises are far more important to build wide flaring lats than the free weight exercises anyway.
- Lat Pullup Exercises
- Lat Rowing Exercises
- Trap and Upper Back Exercises
Lat exercises done on a pullup bar
Basic pullup
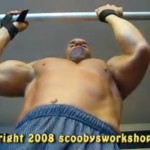
For home workouts, pullups are the #1 most important exercise for lats and there is no substitute! Pullups are an amazing workout that you can do anywhere. Not only do they work lats but they work biceps as well If you want ‘wings’, pullups are your most important tool. If I could only do two exercises, I would choose pushups and pullups – they are that important. If you don’t have a place to do pullups now, a doorway mount pullup bar is a good option. Pull-ups are actually a very difficult exercise to do as it is very difficult to lift your entire weight unless you are very strong and lean. If you can’t yet do a single pullup, don’t despair, read “Pullups for total beginners“. Lets start with the basic pullup.
starting position: The basic pullup is done with your hands facing away from you. To width of the grip should be the same as the distance between your elbows when you point your arms directly out to the sides at right angles to your body. The elbows point outward so the are in the same plane as your body. Your arms are nearly straight, but not quite. Your shoulders are down and back and they stay in this position the entire pullup – pretend you are holding a tennis ball between your shoulder blades. Dont relax into a dead-hang at the bottom and let your shoulder come up to your ears. OK, now that we have the basic starting position, slowly pull up on a two second count.
ending position: Pull yourself slowly up while remembering to keep your shoulders down and back and your elbows pointed directly out to the sides, dont let them drift forward. As you go up, do it slowly and smoothly with no swinging or kicking. When you eyes are at the level of the bar, thats far enough up. Only in PE class and boot camp do you have to get your chin above the bar. Getting the chin above the bar is not beneficial for strength and mass building and it causes people to use the most awful form. If you find you hands get tired before your lats do then its best to use wrist straps. Here are three important videos about how to perform the basic pullup:
Chinups
A pullup is done with the palms facing away from you. A much easier variant of the pullup is called a “chinup” and it is performed with the palms facing you. This exerciser is done with a narrow grip, shoulder width or closer together. It also differs from the pullup in the elbow position. In the pullup the elbows point out to the side, however in the chinup the elbows point forward. The chinup uses lats but it also uses a lot of biceps. The chinup is a great exercise to use when you are not strong enough to do a pullup. The chinup is also a great exercise to do when you are travelling and have no weights, its one of the few ways you can work biceps without weights. If you are a bit confused about chinups, please watch this video on the proper form of chinups. OK, enough about the virtues of the chinup, lets do one!
starting position: The elbows point forward and slightly outward, just do what seems the most comfortable. Your arms are nearly straight, but not quite. In this bottom position, dont go into a relaxed dead-hang! Keep the arms bent slightly which keeps your lats loaded. Your shoulders are down and back and they stay in this position the entire pullup, dont relax at the bottom and let your shoulder come up to your ears. OK, now that we have the basic starting position, slowly pull up on a two second count.
ending position: Pull yourself slowly up while remembering to keep your shoulders down and back. Slowly pull yourself upward without swinging or kicking, try to take a full two seconds to move upward. Although this is called a chinup, dont worry about getting your chin above the bar – only in PE class and boot camp is that required. Just go up as far as you can.
Narrow grip pullup
In this variation of the pullup your hands are close together and parallel. If you are doing this over a pullup bar like I am in these photos, you need to raise your body up to one side of the bar, then the other. At the end video, I show you how you can do these with just rope and a broomstick. Watch this narrow grip pullup video showing proper form and execution.
starting position: The elbows point outward at about a 45 degree angle as shown here. Your arms are nearly straight, but not quite. Your shoulders are down and back and they stay in this position the entire pullup, dont relax at the bottom and let your shoulder come up to your ears. OK, now that we have the basic starting position, slowly pull up on a two second count.
ending position: Pull yourself slowly up while remembering to keep your shoulders down and back. Slowly pull yourself upward without swinging or kicking, try to take a full two seconds to move upward. When your eyes are even with the bar, you are at the top of the movement and you can go back down. On the next rep go up to the other side.
Alternating grip pullup
Watch this video on how to perform the alternating grip pullup. In this variation you have one palm facing you and the other facing away from you. This overloads one lat and lets the other rest a bit, flip hands and repeat. If basic pullups are too easy for you, this is a good way to make those lats work even harder. This exercise is half chin-up and half pull-up. Do one complete set with your left palm facing you, then on the next set have the right palm facing you. Make sure to do an even number of sets to keep your lats equal.
starting position: One palm is facing you and the other is away from you. Most of your weight is on the arm with the palm facing you and the elbow on this arm points forward. On the arm with your palm facing away from you, the elbow points more outward.
ending position: Slowly pull yourself upward without swinging or kicking, try to take a full two seconds to move upward. When your eyes are even with the bar, you are at the top of the movement and you can go back down.
Pullups with added resistance
Here is how to do pullups with added resistance when the basic pullup is not challenging enough. The basic technique is to hold a dumbbell between your legs. When using additional weight its important to keep good form. If you end up having to swing or jerk to get up then you are using way too much weight and are risking injury. Getting the dumbbell into position can be a bit of a trick.
- Stand on a stepstool so you are within reach of the bar, put the stepstool about 18″ behind the pullup bar so its not in the way once you start doing pullups.
- If you are wearing lifting straps as I recommend when doing lots of weight, put them on your wrists snugly now
- Grab the dumbbell and squeeze it between your thighs, you might need to put some 2.5 pound plates on the inside of the dumbbells to make the gap between the 10lb plates wider so its easier to grip with big thighs.
- With the weight squished between your legs, reach up and grab the pullup bar in the desired position and if you are using lifting straps, attach them as you normally would.
- Gently lift up and as you do your legs will swing forward off the stepstool.
- If its a heavy weight, say over 40 pounds, its tough to hold it squeezed long enough to do your set. In this case, bend your knees 90 degrees and let the weight slide down till its resting on the back of your calves.
- Go ahead and do your set of weighted pullups
- At the end of the set, swing slightly to get back on top of the stepstool and slowly reduce pressure on the dumbell so it very slowly and gently sides down between your legs till its between your feet on the stepstool.
TRX Pullup
This is a great lat, bicep, and core exercise you can do without a pullup bar! You have heard me say many time that there is no substitute for pullups when it comes to lat development … and thats true. However, there IS a substitute for a pullup bar. Although I have told folks a hundred places they can do pullups, many still dont seem to have any place to do them. Even if you do have a pullup bar, when travelling or on vacation you cant take that pullup bar with you. This $5 DIY TRX suspension trainer is the ticket for those without a pullup bar or those traveling! Its a lot easier to fit this SRX in your suitcase than this doorway pullup bar setup. In a minute we will talk about how to set it up but lets do the exercise first.
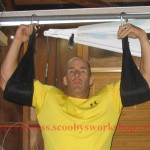
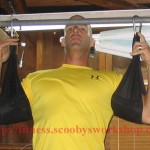
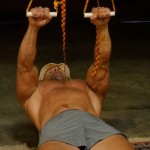
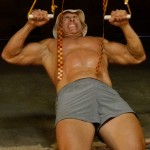
This is a narrow grip pullup in the “L” position, that is, bent at the hips with the legs horizontal. Below are pictures of both the start and end positions. You will feel this exercise predominately in your lats and core but also in your biceps and forearms. If your grip strength is good, you can skip the wrist straps but if your grip gives out before your lats then use the straps – you can workout wrist strength in another exercise, not this one.
When you do this, your thumbs point to your head and your elbows point forward, not to the side. Your legs are held horizontal position to give you a great ab workout as well as a lat and bicep workout. Very important is to keep the shoulder in the packed position the entire exercise. Its very tempting in this start position to use a dead hang, please don’t. Slowly pull yourself up to this position and go as high as you can but there is no need to get your chin “above the bar”, thats only for PE class and bootcamp, you get all the benefit by just going as high as I am illustrating here without any of the risks associated with going higher. Keep the legs horizontal for as many of the reps as you can but if you have to, bend the knees, or drop your legs completely so that your lats can go to failure.
Lat exercise with injured wrist/hand/elbow
If you have an injured elbow, wrist or hand its very difficult to workout your lats but here is a great, safe, alternative. I get such a great pump from doing this that sometimes I do it even though I’m not injured. The range of motion on this exercise is rather limited but it still is a killer workout for the lats. Focus on keeping the shoulders stationary and doing all the lifting with your lats.
starting position: Angle your arms up as much as you can without risking sliding out of the straps. Its tempting to let your shoulders come up to your ears in the up position in an attempt to get a bigger range of motion – dont do it! Keep your shoulders down and back with your chest thrust out during the whole exercise – pretend you are holding a tennis ball between your shoulder blades. The hands should only be very lightly touching the bar or straps, not hanging on – all the weight is on your triceps.
ending position: Very slowly over a two or three second count do a ‘pull-up’ while focusing on doing all the lifting with your lats. Go up as high as you can then back down.
Rowing lat exercises
Dumbbell Rows
Pull-ups alone make a fantastic lat workout and give you a wide back. If you have a dumbbell set also, you can do dumbbell rows as a good complimentary exercise. The key on this exercise is to keep the entire body stationary except for the arm which moves up slowly. The other three limbs remain completely motionless and both shoulders remain stationary. If you have to jerk it up, you are using too much weight! You can do this on a weight bench or as I do, use a coffee table with a cushion on it. Here is a video showing the proper form of the dumbbell row.
starting position: right arm locked out, left leg locked out, right knee bent and resting on cushion, head in comfortable position. You arm is straight but not locked. Your shoulders are held down and back and they stay in this position the entire exercise, you chest should be thrust out. In this down position, do not let the weight pull your shoulder toward the floor – it should remain back with your chest thrust out. Slowly over a 2 second count pull the weight up to your hip while keeping your elbow close to your body and your shoulder stationary. FEEL this in your lat, flex your lat while you do this.
ending position: Elbow is about 90 degrees at the top of this motion. Note the rest of the body has not moved at all. Now slowly lower the weight making sure to keep the shoulder in the same location keeping your lat flexed the whole way down.
Barbell Rows
This is similar to the dumbbell row except you are working both lats at once. Although this is a great exercise for gently strengthening the spine extensors, skip this exercise if you have a history of lower back problems. Here is a video showing the proper way to do the barbell row. Remember, this is not a dead-lift. Keep your legs straight and your back stationary. If your hamstrings are not flexible enough to bend over and make your back horizontal, then go as far as you comfortable can or bend you knees slightly.
starting position: The arms are almost straight but not locked. Best is to use an underhand grip, that is, with your palms facing forward. The shoulders are back and down with your chest thrust out for the entire exercise, dont roll your shoulders forward and dont let the hanging weight pull your shoulders downward. Your abs are flexed hard turning your torso into a pillar of steel to support your spine. Your back is in the neutral position, not arched like a hissing cat and not sagging like a camel. Keep your shoulders down and back with your chest thrust out during the whole exercise – pretend you are holding a tennis ball between your shoulder blades. The bar is not hanging but forced to rub lightly along the legs the whole range of motion. Now slowly start pulling the weight up toward your hips. Keep your abs flexed tight to support your lower back and protect it from injury.
ending position: Keep pulling the bar up toward your hips in a slow controlled motion over a two second count until it lightly touches your abs. Make sure that your back, shoulders, and legs are all completely motionless. If you cant do this then you are useing too much weight. Now slowly lower the bar trying to keep it under your hips.
Dumbbell Pullover
Pull-ups alone make a fantastic lat workout and give you a wide back. When you are an advanced bodybuilder searching for more exercises for your lats, the pullover is a great one! I dont know why but their is a lot of misinformation about this exercise out there. Many websites mistakenly list it as a chest exercise. Perhaps they do this because there is “common wisdom” that the pullover “expands your ribcage” to make your chest bigger – no. You cant stretch your way to a big chest anymore than you can become taller by hanging upside in gravity inversion boots all day long. This is an exercise predominately for your lats but it does work rear delts, tris, and a bit of pecs too.
starting position: arms straight but not locked. Hands around dumbbell handle with palms on the inside surface of the dumbbell. Shoulders are down and back like you are pinching a tennis ball between your shoulder blades. Feet wide apart for balance. Torso and upper legs co-linear and held rigid with flexed abs.
ending position: Slowly lower the dumbbell with a 2 second count till the elbows are in the plane of your body, do not go further back. Now slowly lift back up to starting position with a 2 second count again.
Incline Barbell Rows
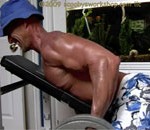
This is one of my favorite rowing type lat exercises but it does require an adjustable bench. The reason I like this exercise is that it puts no strain at all on the lower back. The torso is completely supported by the bench and the pull is symmetrical, that is, you pull evenly with both hands at the same time. As with all rowing type exercises for lats, you pull the weight up toward the hip, not the shoulder. The shoulders remain stationary during this exercise, dont let the hanging weight drag them down. Here is a video showing the proper form of the incline barbell row.
starting position: The arms are almost straight but not locked. Best is to use an underhand grip, that is, with your palms facing forward. Keep your shoulders down and back with your chest thrust out during the whole exercise – pretend you are holding a tennis ball between your shoulder blades. Dont let the hanging weight pull your shoulders downward, keep them in position. The bar is not hanging but forced to stay back under the hips. Now slowly start pulling the weight up toward your hips.
ending position: Keep pulling the bar up toward your hips in a slow controlled motion till it lightly touches the underside of the bench. Now slowly lower the bar trying to keep it under your hips.
TRX Low Row
The SRX low row is one of my new favorite exercise. The best thing about it is that all you need to do it is this $5 SRX that you can take with you anywhere. If you havent made your SRX yet, this is how to make your own SRX setup. This exercise is appropriate for all levels of lifters from rank beginner to 30 year vetrans of lifting like myself. Its simliar to a low cable row at the gym without all the expensive equipment and it works lats, upper back, and traps.
One Legged Kettlebell Row
I like my combination exercises. With time at a premium, my days of simple isolation exercises with lots of rest between them are long over. I like to do exercises that give you the most bang for your buck and this is one of them. Its a great lat exercise but its also a great core exercise and balance exercise at the same time! Three times the benefit in the same amount of time. You can do this exercise with a dumbbell or a kettlebell. Although this looks the same as a single arm dumbbell row for lats that you do on the workout bench, its much harder. I would suggest using about 60% of the weight that you can do on a bench.
The balance takes some practice, hang in there, you will get it after a few months. Remember use the weight for balance! You cant over-power a misplaced weight with the tiny stabilizing muscles in your ankle.
The hardest thing is getting into the start position. keep the shoulders as parallel to the floor as you can, dont let the shoulder doing the work drop toward the floor (as I am here I might add). The supporting leg should be slightly bent to aide balance. Try to get your body as horizontal as possible. Hint: Drop your torso way lower than you think it should go and raise your foot way higher than you think it should go and your position will be about right. Try to keep this torso position the whole set long.
Now slowly raise the dumbbell/kettlebell up to your hip trying to keep your torso immobile. Keep your leg high and your head low to counteract the tendency to drag the foot.
Resistance Band Row
Trap And Upper Back Exercises
TRX Shoulder Row
The SRX shoulder row is an awesome upper back, shoulder and trap workout that is appropriate for all ability levels. DO DEADLIFTS you say? Deadlifts are great but try fitting an olympic bar in your suitcase the next time you fly anywhere! Not everyone has enough space or enough weight to do deadlifts in their home gym either. You can do this exercise while on vacation, at home, at the gym, or even under a tree with this $5 SRX setup that fits into the palm of your hand. If you want “back bumps”, then this is the exercise for you!!! To the untrained eye, this exercise looks very similar to last weeks exercise which was the hip row for lats but little changes in form make huge differences in what muscles are worked. This exercise is all shoulders and upper back. The big difference is that in last weeks video for lats we rowed with our elbows brushing our sides. This shoulder row is done with the upper arms parallel with each other which makes it all shoulders and upper back.
- Shoulders. So whats the most important form thing .. YES, shoulder packing! You are not going to do this: hug pillow, arch like banana. Hold your sholders in the packed position – down and back.
- Alignment. The body is rigid and straight like an I-beam – don’t let your butt sag but don’t push your hips to the ceiling either. Keep that core flexed during the entire exercise to support your lats, pretend you are bracing for a punch to the gut.
- Arm position. The upper arms should be parallel to each other or very slightly dropped so you look like a 747 ready for takeoff. There is a tendency to let the elbows drop down toward the hips because its easier, dont be tempted, thats last weeks exercise, not this weeks shoulder exercise. If you find your elbows dropping, take a step back, make your body more vertical, and try again.
Dumbbell Shrug
Vertical Band Row
Reverse Flys
One last reminder about the importance of nutrition, its just as important as lifting weights when it comes to adding muscle mass. Don’t bother tearing your muscles down unless you plan on giving them the constant supply of nutrients they need to rebuild! If my free healthy recipes dont appeal to you then consider buying this bodybuilding cookbook (read my review).


