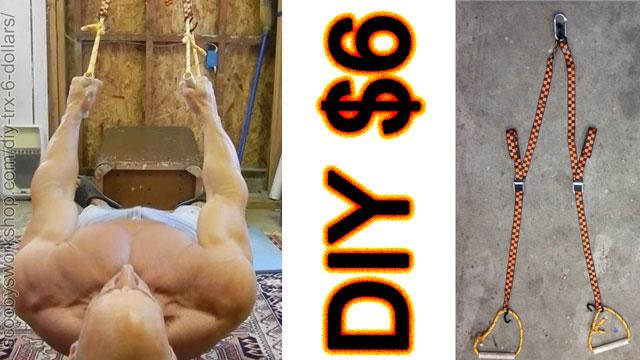
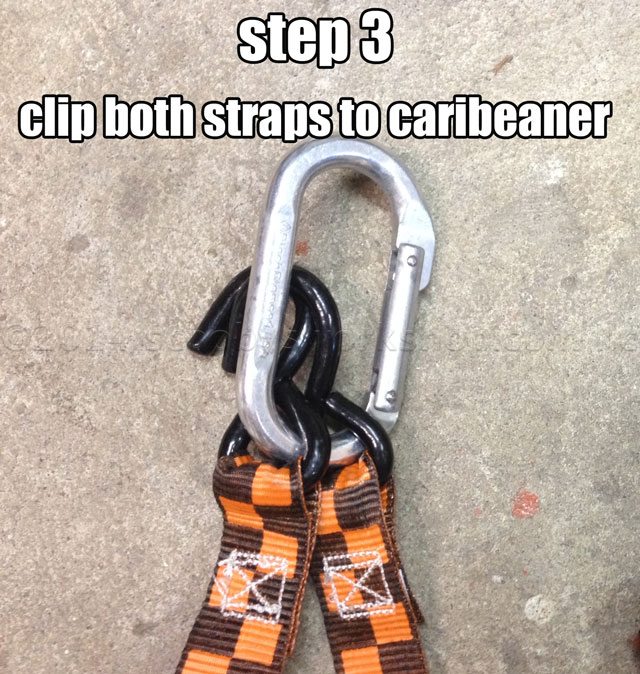
DIY TRX for 6 Dollars
SRX suspension trainer- (Scooby’s Rx)
Suspension training is NOT for “toning”, its a serious bodybuilding tool as you will find out in my upcoming videos. Not only is suspension training great for home workouts but its great for travel workouts as well. It allows a wide variety of exercises without the need for weight plates because your body weight is used for resistance and geometry is used to vary the difficulty from beginner-easy to advanced-killer-hard. How would you like to be able to do 600 pounds shrugs without having to buy all those weight plates? You can with suspension training! Even if you have weights already, its a great addition to your workout arsenal and its AWESOME for vacation workouts and workouts while on the road.
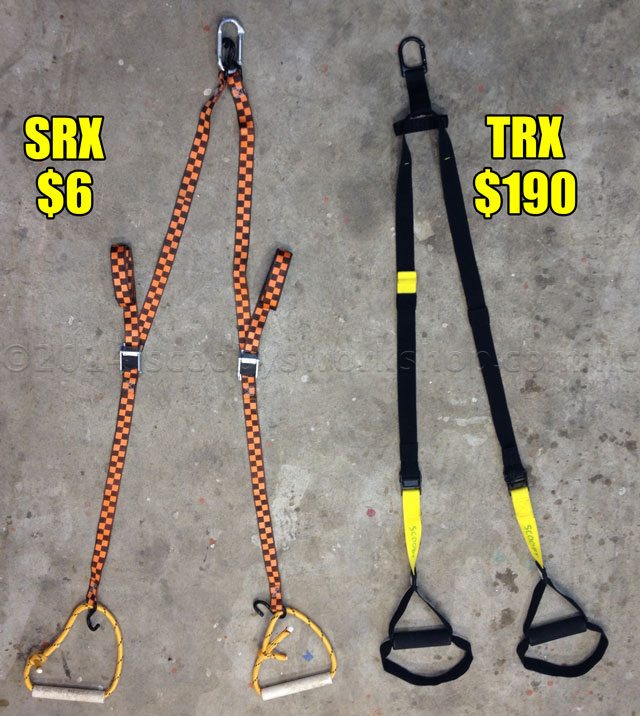
TRX is the pioneer in suspension training and their unit is high quality, strong, and well made, the problem is that it is overpriced – the TRX suspension trainer is $190. In this video I will show you how to make your own in 5 minutes that is just as good for just $6.
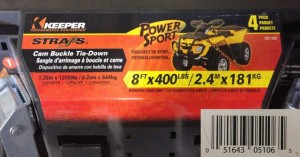
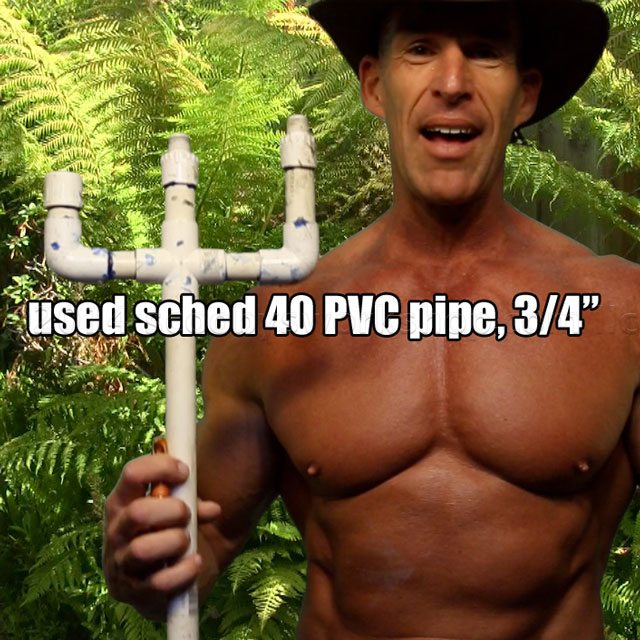
Here is what you need:


Making your SRX suspension trainer
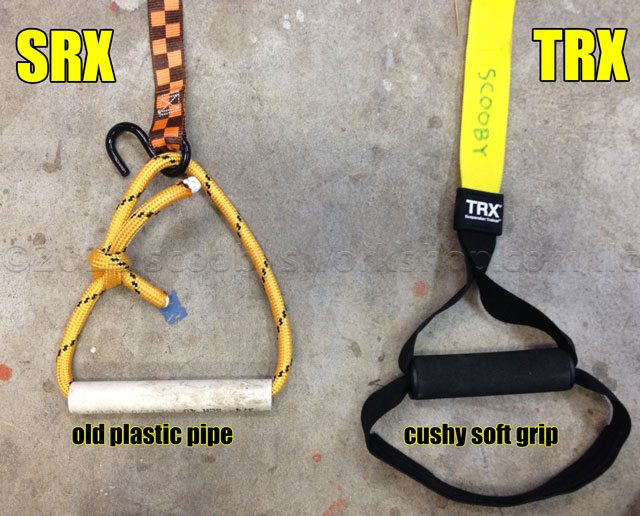
1) First cut the 3/4″ schedule 40 PVC pipe to be about three fingers wider than your closed fist, then sand the inner and outer edges. Learn to tie a boline knot!
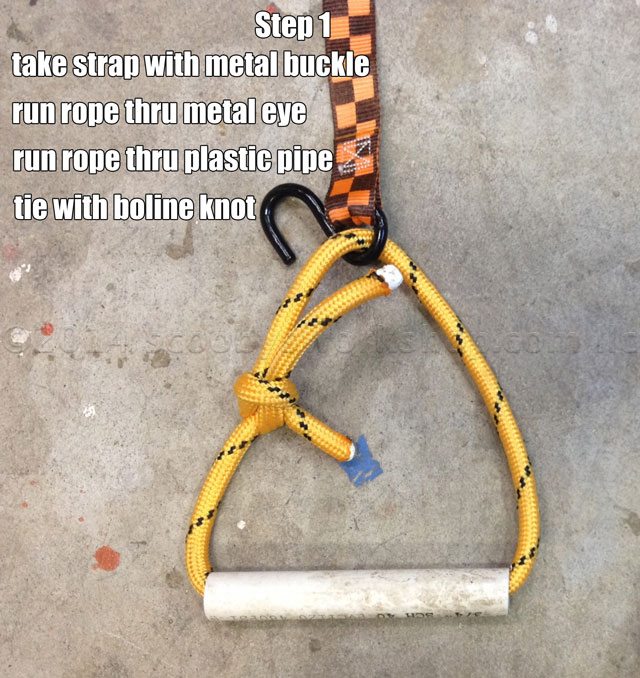

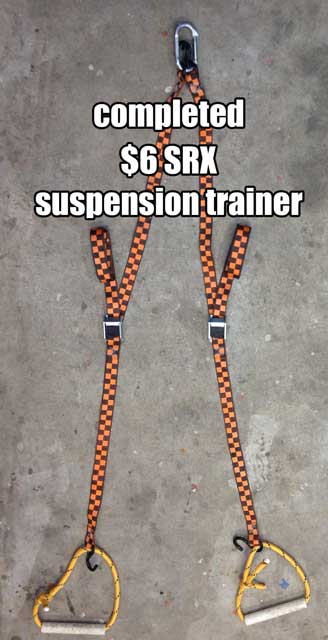
Thats it! You are done in under 5 minutes! Here is what the finished product looks like:
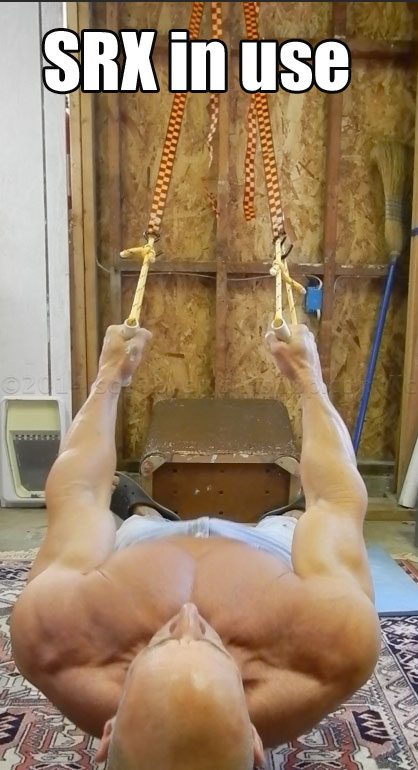
Using the SRX suspension trainer
I will be doing a whole series of videos on how to incorporate suspension training into your home workouts with awesome hybrid workouts using the best of weights and suspension training to maximize your results with a minimum of equipment. Remember to be *very* careful about what you attach your suspension trainer to, it must be very strong.
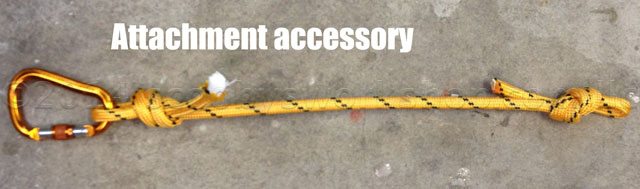
Accessories
There are a few bells and whistles you can add that make it a bit more versatile. For example, you can add a foot loop from the PVC handle. Just make a loop and tie it with a boline.
You can also make a door-mount for use in hotel rooms although use this with caution if you are strong or you will pull the door down. Only recommended as a last resort. Make sure to put it as close to the hinge side of the door as you can. Drill a hole thru a block of plywood, make a stopper knot on one side and a simple loop on the other to attach your caribeaner to. If the door gap is small, you can use your left over strapping material too.
Below is a great accessory for attaching your SRX to various odd sized objects, it also allows you to make the SRX longer if you want.
Comparison of SRX and TRX
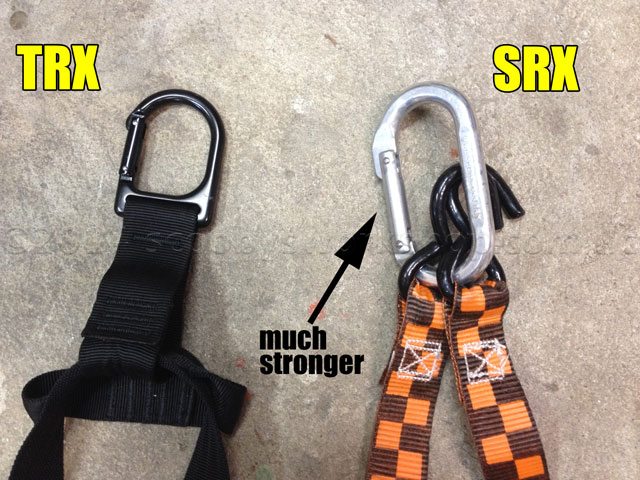
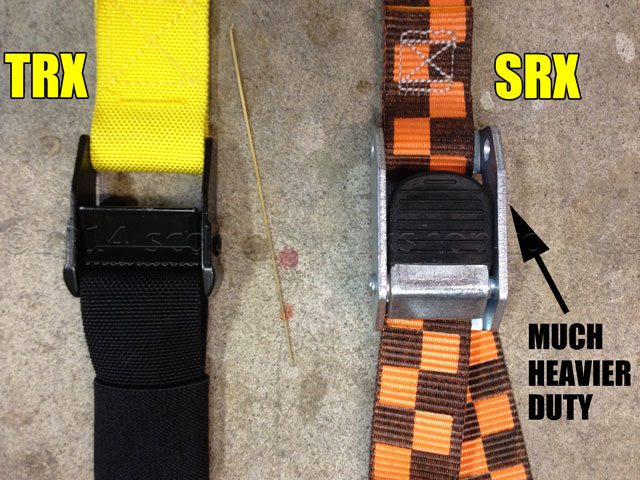
Strength is #1 when it comes to suspension trainers because of the incredible forces that they must support, its not just your bodyweight – it can be 2x-3x your bodyweight. All Caribeaners, buckles, straps, and rope must be *very* strong. The trite phrase “a chain is only as strong as its weakest link” applies here! If you want to substitute cheaper components, scrutinize their strength and construction carefully. Use these photos as a guide.
Notes about safety
No warranties expressed or implied. This is free speech here, use this DIY information at your own risk. If you don’t trust your ability to make this safely then pay $190 for the well made TRX system. By the way, be vary wary of the cheap knock off products. I saw a bunch of “suspension trainers” on Amazon for under $40 and they all looked too weak to hold someone of my weight to use safely. Inspect the clamps of any pre-made product very carefully before buying to make sure they are sturdy enough. You will note that this DIY SRX system actually costs about $18 per set if you use the materials I have specified, not $6. You *can* make one for $6. The caribeaner is not required, you can just tie it up with rope. You *can* use a cheaper strap set, Home Depot has one for $6 and that is all you really need if you weigh under 160 pounds. The problem is one of strength. The $6 set is only rated for 200 pounds so each arm or 400 pounds total. Now you might think that is “plenty strong” but remember that because of the geometry and leverage that advanced bodybuilders can use, its easy to double the bodyweight force put on the straps – that is, a 220 person can put 440 pounds force on the straps. While the ability for me to do 440 pound shrugs without a single weight plate is amazing, it points out how strong this stuff needs to be. Not only that, we always need a safety factor. These straps and rope are rated for 400 pounds per arm or 800 pounds total. As an engineer, I am not comfortable without a minimum of a 2x safety margin. When you look at the comparison photos of the SRX components and compare those to the TRX, you will note that mine is much beefier and heavier duty. By the way, you will note that the straps themselves have a breaking strength of 1200 pounds but are rated for 400 pounds. That means the straps themselves have a 4x safety margin built in.
The people who work with heavy equipment decade after decade without accident have a mindset in common – they are always asking themselves “what might go wrong now and what would happen to me if it did?”. For example you are lifting something heavy, what might happen? Right, you might drop it on your feet. Oh, lets put a block of wood down so that it would drop onto the block instead of my foot. Similarly, when using any suspension trainer always be asking yourself what might happen if it were to break or your feet were to slip. Do it on a padded surface free of pointy clutter!