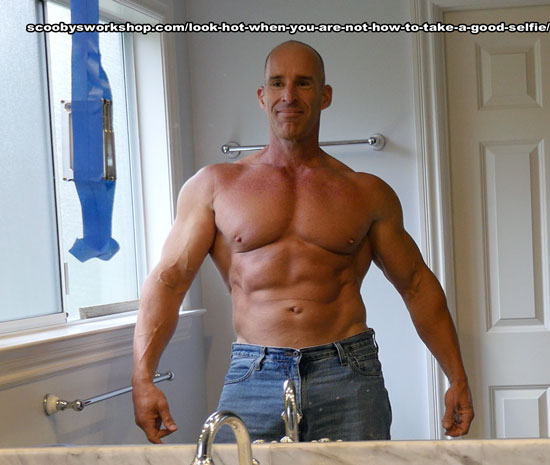
Look hot when you’re not! How to take a good selfie
Only one in a ten thousand people look good in a candid photo, the rest of us have to be smart about the way we take pictures of ourselves. There is no honor it taking an un-flattering selfie. You spend thousands of hours in the gym in a year, its worth 2 hours of effort to take some really good pictures of yourself. I am being completely honest here when I tell you that I really don’t have that great of a physique. The reason I look reasonably good in my videos is that I understand the tricks of the trade for looking better than life to the camera lens. If you can afford a top notch photographer, great. Otherwise, read this article and find out how to make yourself look HOT! Four separate steps
- Physical preparation of your body for the photo shoot
- Finding the proper place to take the photo
- Getting your photo gear together (might just be a smart phone)
- The photo shoot itself
If you think its weird or vain, or narcissistic to spend 2 hours taking a physique picture of yourself then let me ask you this. Why is it “completely normal” for a guy to spend 5 minutes each morning standing in front of a mirror primping their hair? That works out to 30 hours a year of staring at yourself in the mirror, isn’t that really narcissistic? There is nothing wrong with presenting your best image based upon what you have.
Preparation for the photo shoot
OK, you have been lifting for months or years and eating clean – that hardest part is done. Now we are going to take your current state and show it off to its best advantage.
- Dropping water weight to increase definition and vascularity. Please don’t skip this step! It can improve your definition as much as 6 weeks of dieting in just 3 days. Cut all sodium out of your diet for the 4 days before the photo shoot, please read how to do this on my page increase your vascularity in one week. What this basically means is that for 3 days you can eat no connivence foods, no foods from restaurants, no canned foods, no frozen foods … you get the idea. The only foods you can eat are ones you prepared yourself from raw ingredients, otherwise you are getting too much salt.
- Head grooming. Get that haircut! Get rid of those nose hairs and bushy ears. The high resolutions will bring them out in all their glory and you do not want that. Make sure you are clean shaven or have groomed your beard. If you have wild eyebrows, deal with them. Either get them professional shaped or do what I do and just ‘mow’ them with a #1 electric hair clipper.
- Body hair. Shaving your body is a great way to make yourself look much more defined and lean BUT DO NOT DO IT THE WEEK BEFORE A PHOTO SHOOT! You will look like a plucked chicken. Start body shaving at least 2 months before and let your skin get used to it. If its too late, consider just clipping your hair with electric hair clippers to a very short length (<1mm). It will look almost like you are smooth shaven without all the skin irritation. Please read about body shaving.
- Skin and tanning. Tanning beds are just not worth it, too much time and not good for your skin. Consider just leaving your skin its natural color. If you *really* want a tan then do a professional spray tan, its worth the money! I would not recommend the DIY self application tan products as I have seen one to many people who end up looking like carrots. Giving your skin a healthy sheen really helps your photo. Many people lather up with baby oil till they look like an oil slick before a photo shoot, please don’t do this, it looks too much like you are about to shoot a mud wrestling video. The best thing to do is to just use a normal hand lotion or use olive oil. After application of the oil or hand lotion, take a towel and scrub everything off, every last bit. This will give you a healthy sheen without looking slimy.
Proper place to take the photo
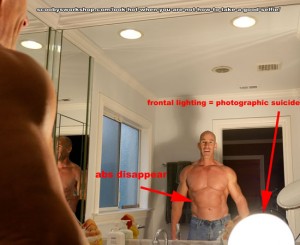
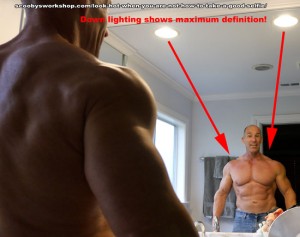
Down lighting, not front lighting. This listed first because its most important. You MUST find a place to take your photo that has down lighting, and by that I mean light that comes from above and slightly in front of you. Photos are not three dimensional. The only way you can convey muscular definition is with shadows and to get shadows requires light from above. The #1 worst physique photo is that taken from a camera with a flash – it completely obliterates any abs and definition you have. Many bathrooms have those old fashioned dressing room lights mounted on the wall right above the mirror – photographic suicide! These dressing room lights are just as bad as a camera with a flash on it. Lets talk about some other forms of photographic suicide, direct sun light. Camera technology is still rather poor at catching even a fraction of the dynamic range that our eyes can catch. When we see a great physique in the sun with our naked eyes, it looks awesome .. but not to the camera. The camera can either see the bright sun lit spots, or the dark shaded spots, but not both. So where can you find good down lighting? Fortunately many gym dressing rooms have recessed lighting that is perfect for this. The best down lighting comes from a wide light rather than a point source. Taking a photo with only one recessed light makes you look severe, like a hatchet murder at halloween. Best is three or four recessed lights within your ‘wingspan’, the distance between your outstretched hands. If you have access to a room with a skylight, that is probably the #1 best place you can take your photo. Many gyms have skylights in their aerobics rooms and these are perfect lighting. Another place with great lighting is under a tree on a cloudy day, you catch the down lighting from the sky.
- An uncluttered background. You don’t need a white photographic back drop but make sure that the background does not distract from YOUR image! If you are taking a photo in the bathroom, close the door, remove the towels and gee-gaws, and anything else that can be taken out. I realize that most of you will be using smart phones for your photos but if you have a SLR camera, you can also use as low an F stop as you can to blur the background and focus the attention on you.
- Background lighting and color. The background needs to be approximately the same brightness as you are otherwise your camera will make your image either too bright and washed out or turn you into a silhouette. Also, mind the color of the background so you don’t become invisible and blend into your background. If you have a darker complexion, use a whit or light background. If you are lily white, then use a darker background.
Getting your photo gear together
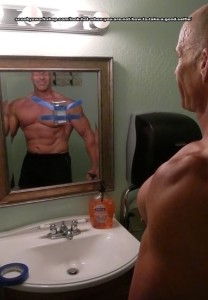
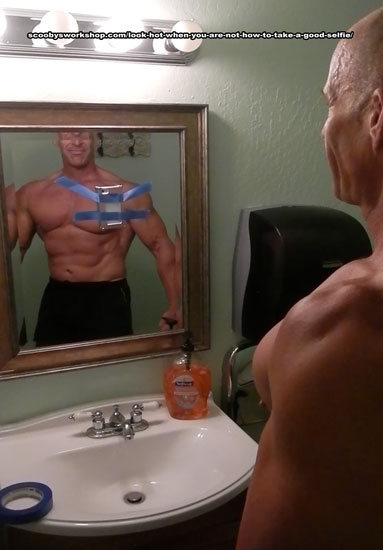
- Get a mirror! A professional model can hit a pose perfectly and know exactly what they look like to the lens without even opening their eyes but we are not professional models. We have no idea how to flex and position ourselves into a pose that looks good. Start by looking on the internet for poses you think look good and try to do them yourself. A mirror is an essential tool in the photo shoot which is why gym dressing rooms are a pretty good place to take photos – you can watch yourself in the mirror and see exactly what the camera lens sees. Very important though, the camera points toward YOU, not the mirror. Do not take photos in a mirror! The self-focus is thrown off 90% of the time and the mirror will be in focus but you will be blurry. Even if it does focus, the image quality is drastically degraded taking the photo in a mirror. You need the mirror to see your poses but tape your camera to the mirror with the lens facing you. If you are taking a photo in a room that doest have a mirror then find a hanging wall mirror somewhere and bring it into the room where you are taking your photos. Lean that mirror against the wall so you can see yourself doing the posing!
- Get a camera! It can just be a smart phone but if you have a real camera that will be better. Absolutely essential is that either have a self timer or the ability to take video. When we think of taking photos, we think of ‘click’. There is a much easier way. Posing is tough and so is setting self timers. Its much, much easier to just take a long video of you hitting each pose and then frame grabbing the best of each. SO much easier to get the perfect pose! Just make sure that your video is at least 1080p and make sure that you fill the entire frame so that you are not a dust speck in the video. If you are doing video, the key is to move VERY slowly. Decide how fast you should move and then move 1/5 that speed. If you are doing a side chest pose, hit the pose, and then very slowly rotate 45 degrees so you get all angles. Even normal motions result in blurry images in the video so move slowly so that your frame-grabbed images are sharp.
- Get a tripod or a roll of tape! To take a good physique photo requires that it be taken from an optimal height and just setting your camera on a counter or book case will most likely not be optimal. If you have a tripod, thats the easiest but you can also just tape your camera up with masking tape! As mentioned, a mirror is critical and the best thing to tape your camera to is the mirror because then the camera sees EXACTLY what you do and you can pose perfectly. NO HAND HELD SELFIES! There is no way you can present your physique optimally when you have to hold the camera.
- Ditch your photographer! YOU are the best photographer! Do NOT have a friend, girlfriend, or boyfriend take the pictures. YOU know how you look best, YOU are best at posing yourself, and YOU have the patience to spend a few hours to get some really good photos of yourself. If you have a professional photographer with a real studio, have them take your photo, otherwise take the photo yourself without any help from others.
The photo Shoot
- Allow at least 3 hours! Don’t rush it.
- Good posture
- Practice in the mirror!
- Smile, not clench
- Flex lightly, not hard
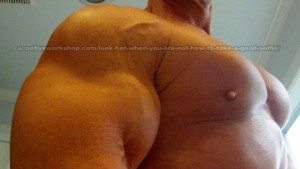
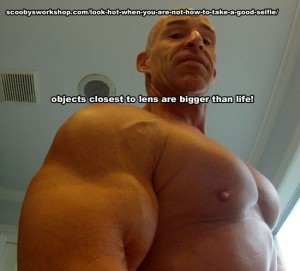
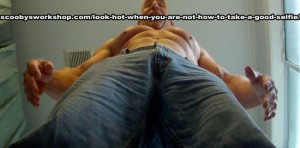
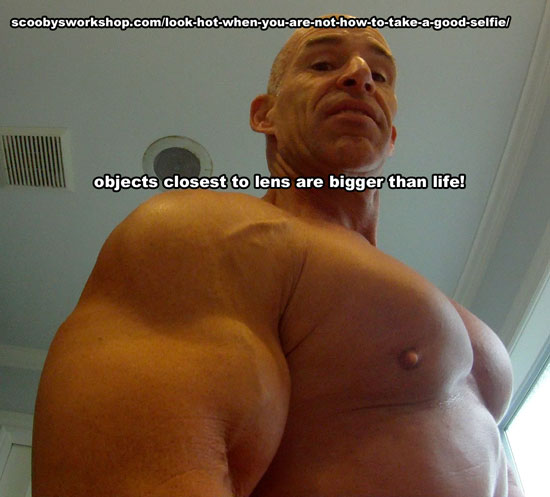
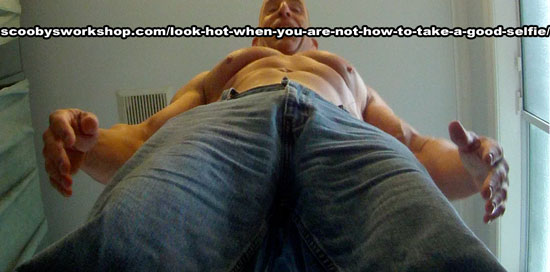
- Items closest to lens look larger. Few people realize this but its incredible. Things closest to the lens look bigger than life and things further away look smaller than they really are – remember this when you pose! If you have huge legs and a small chest, position the camera at head height and take the photo downward and it will make your chest look huge and your legs more in proportion. Want to make your shoulder and chest look huge and your waist small? Lean toward the camera! Don’t overdo it or its too obvious. You don’t want to look like you are giving a flex show on a webcam by sticking your biceps into the camera lens :)
- Shoot, upload, review, and re-shoot! This is critical. Do not take your photos, pack up, get dressed, and go home because that first round of photos sucked – I guarantee you. Your pants are on inside out, your hair is messed up, your dog is barfing in the background, you are blurry, and the image is too dark. There is ALWAYS something wrong in your first round of photos. Your first photos will fail, don’t be discouraged. Pretend the photos are of someone else and you are the photographer and ask yourself, how can I make these photos better? Even though you are looking in the mirror as you are posing, you will find things you don’t like. Thats why I said this takes 2 hours because you will probably need to reshoot at least two times to get optimal photos – take your time!
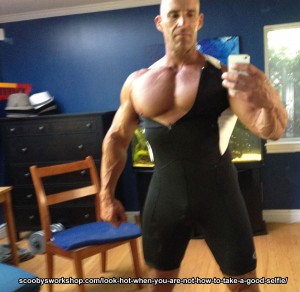
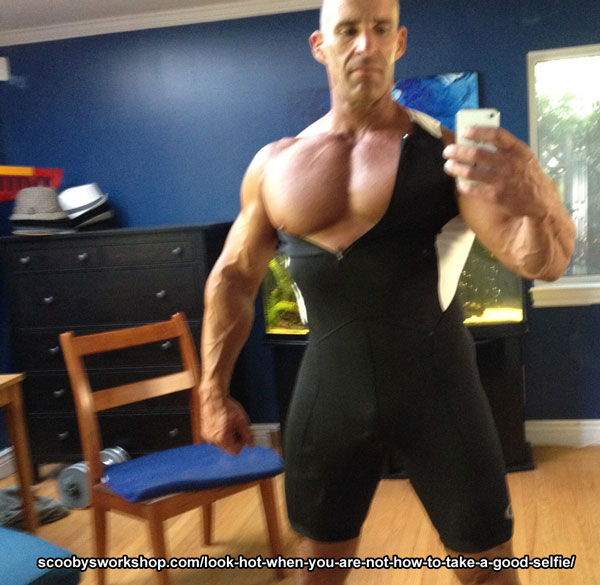
QUIZ – whats wrong with this selfie?
Whats wrong with the above photo?
This photo shows lots of mistakes, can you name them? What things were done right? Scroll down to see the answers!!!!
Whats right?
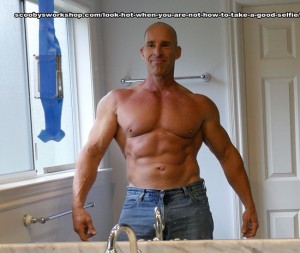
- The lighting is excellent. Good down lighting. Notice the vascularity in the pecs, shoulders and arms – that is from the down lighting. If the light was from a flash on the camera you would not have seen any of that definition and vascularity.
- Light flexing, nothing straining. No weird facial contortions
- Pose is reasonably good
- Skin shiny without looking like an oil slick
- Hair is … well neat and tidy :)
Whats wrong?
- HORRIBLE background! Distracting as heck, all you want to do is yell – “CLEAN UP YOUR ROOM!” Bright light in background hurts the eye. Not only that the black triathlon suits blends into the black aquarium stand so you cant see the outline of the legs.
- The picture is blurry! Why? Because I am doing the biggest “No-No” – taking a photo by pointing the camera at the mirror. The camera focused on the mirror rather than on me so the mirror is in perfect focus but I am blurry.
- I should have used the “closest bodypart to lens looks bigger” to my advantage here but I just took a flat photo from hip level.
- Not enough resolution! The picture is just 600×600, it should be at least 2000 pixels x 2000pixels!
- The image is washed out. There are parts of my skin so blinding white that you cant see any detail. The image should have been darker, the culprit is the bright light coming from the window behind me.
How about these selfies:
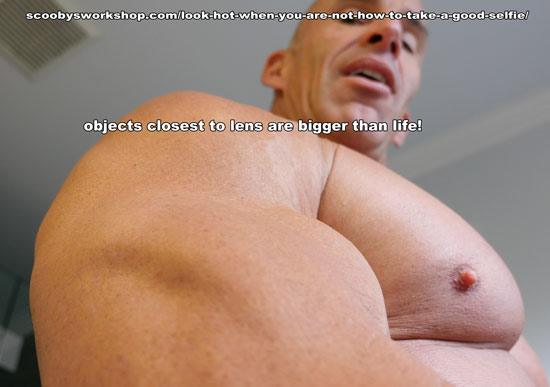
OK, this one is even sillier. You can take the stuff-the-body-part-into-the-lens thing to ridiculous extremes
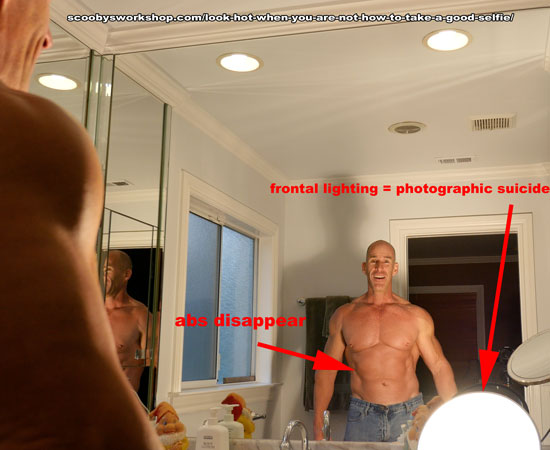
Horrible lighting. If someone takes a flash photo of you with a point-and-shoot camera, this is the bad type of image you get
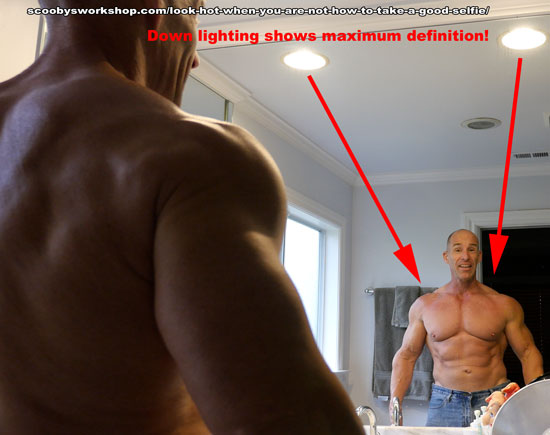
This is a really cool selfie in my opinion. Gets the back and the front in one photo. 8/10 for lighting. 8/10 for composition. 8/10 for good background.
Many have asked why I dont think I have a good physique. I am very happy with my physique, dont get me wrong. I am speaking from the point of view of a judge in a men’s physique competition. Yes, I have the muscle mass but I have some incurable defects.
- really wide hips which make V-taper rather un-impressive.
- spine inflexibility making 1/4 twist not possible, again making V-taper less than inspiring.
- lack of symmetry due to scoliosis.
- sagging skin – old age
In the curable department, my bodyfat is where I keep it 365 days a year, lean but not too lean. For a contest I would have to drop 10 pounds of fat. My legs are optimized for endurance events, to have them visually balanced with my torso, I would need them to be bigger – not gonna happen.

